Felix Krause
Co-Founder of contextsdk.com
Founder of fastlane.tools

While I leverage AI for my work, all my blog posts are handcrafted.
How to train your first machine learning model and run it inside your iOS app via CoreML
Note: This is a cross-post of the original publication on contextsdk.com.
Introduction
Machine Learning (ML) in the context of mobile apps is a wide topic, with different types of implementations and requirements. On the highest levels, you can distinguish between:
- Running ML models on server infrastructure and accessing it from your app through API requests
- Running ML models on-device within your app (we will focus on this)
- Fine-tuning pre-trained ML models on-device based on user behavior
- Training new ML models on-device
As part of this blog series, we will be talking about variant 2: We start out by training a new ML model on your server infrastructure based on real-life data, and then distributing and using that model within your app. Thanks to Apple’s CoreML technology, this process has become extremely efficient & streamlined.
We wrote this guide for all developers, even if you don’t have any prior data science or backend experience.
Step 1: Collecting the data to train your first ML model
To train your first machine learning model, you’ll need some data you want to train the model on. In our example, we want to optimize when to show certain prompts or messages in iOS apps.
Let’s assume we have your data in the following format:
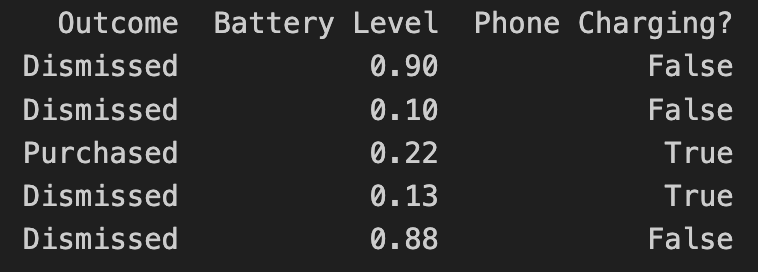
- Outcome describes the result of the user interaction, in this case, if they purchased an optional premium upgrade
- Battery Level is the user’s current battery level as a float
- Phone Charging defines if the phone is currently plugged in as a boolean
In the above example, the “label” of the dataset is the outcome. In machine learning, a label for training data refers to the output or answer for a specific instance in a dataset. The label is used to train a supervised model, guiding it to understand how to classify new, unseen examples or predict outcomes.
How you get the data to train your model is up to you. In our case, we’d collect non-PII data just like the above example, to train models based on real-life user behavior. For that we’ve built out our own backend infrastructure, which we’ve already covered in our Blog:
- Building the Infrastructure to Ingest 40m Context Events per Day
- Unifying Data Models Across a Heterogeneous Stack
Step 2: Load and prepare your data
There are different technologies available to train your ML model. In our case, we chose Python, together with pandas and sklearn.
Load the recorded data into a pandas DataFrame:
import pandas as pd

rows = [
    ['Dismissed', 0.90, False],
    ['Dismissed', 0.10, False],
    ['Purchased', 0.24, True],
    ['Dismissed', 0.13, True]
]
data = pd.DataFrame(rows, columns=['Outcome', 'Battery Level', 'Phone Charging?'])
print(data)
Instead of hard-coded data like above, you’d access your database with the real-world data you’ve already collected.
Step 3: Split the data between training and test data
To train a machine learning model, you need to split your data into a training set and a test set. We won’t go into detail about why that’s needed, since there are many great resources out there that explain the reasoning, like this excellent CGP Video.
from sklearn.model_selection import train_test_split

X = data.drop("Outcome", axis=1)
Y = data["Outcome"]

X_train, X_test, Y_train, Y_test = train_test_split(X, Y, test_size=0.2, shuffle=True)
The code above splits your data by a ratio of 0.2 (⅕) and separates the X and the Y axis, which means separating the label (“Outcome”) from the data (all remaining columns).
Step 4: Start Model Training
As part of this step, you’ll need to decide on what classifier you want to use. In our example, we will go with a basic RandomForest classifier:
from sklearn.ensemble import RandomForestClassifier
from sklearn.metrics import classification_report

classifier = RandomForestClassifier()
classifier.fit(X_train, Y_train)
Y_pred = classifier.predict(X_test)
print(classification_report(Y_test, Y_pred, zero_division=1))
The output of the above training will give you a classification report. In simplified words, it will tell you more of how accurate the trained model is.
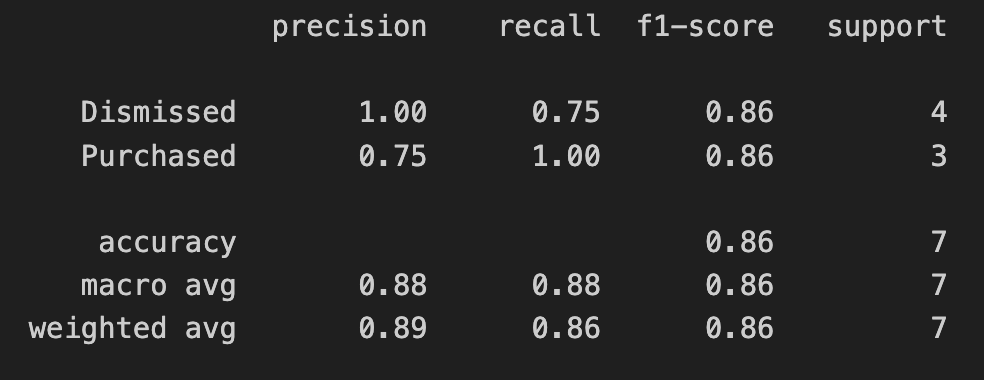
In the screenshot above, we’re only using test data as part of this blog series. If you’re interested in how to interpret and evaluate the classification report, check out this guide.
Step 5: Export your model into a CoreML file
Apple’s official CoreMLTools make it extremely easy to export the classifier (in this case, our Random Forest) into a .mlmodel (CoreML) file, which we can run on Apple’s native ML chips. CoreMLTools support a variety of classifiers, however not all of them, so be sure to verify its support first.
import coremltools

coreml_model = coremltools.converters.sklearn.convert(classifier, input_features="input")
coreml_model.short_description = "My first model"
coreml_model.save("MyFirstCustomModel.mlmodel")
Step 6: Bundle the CoreML file with your app
For now, we will simply drag & drop the CoreML file into our Xcode project. In a future blog post we will go into detail on how to deploy new ML models over-the-air.
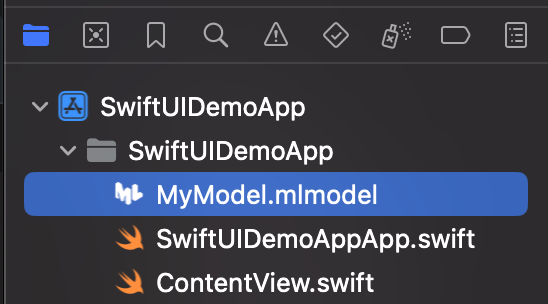
Once added to your project, you can inspect the inputs, labels, and other model information right within Xcode.
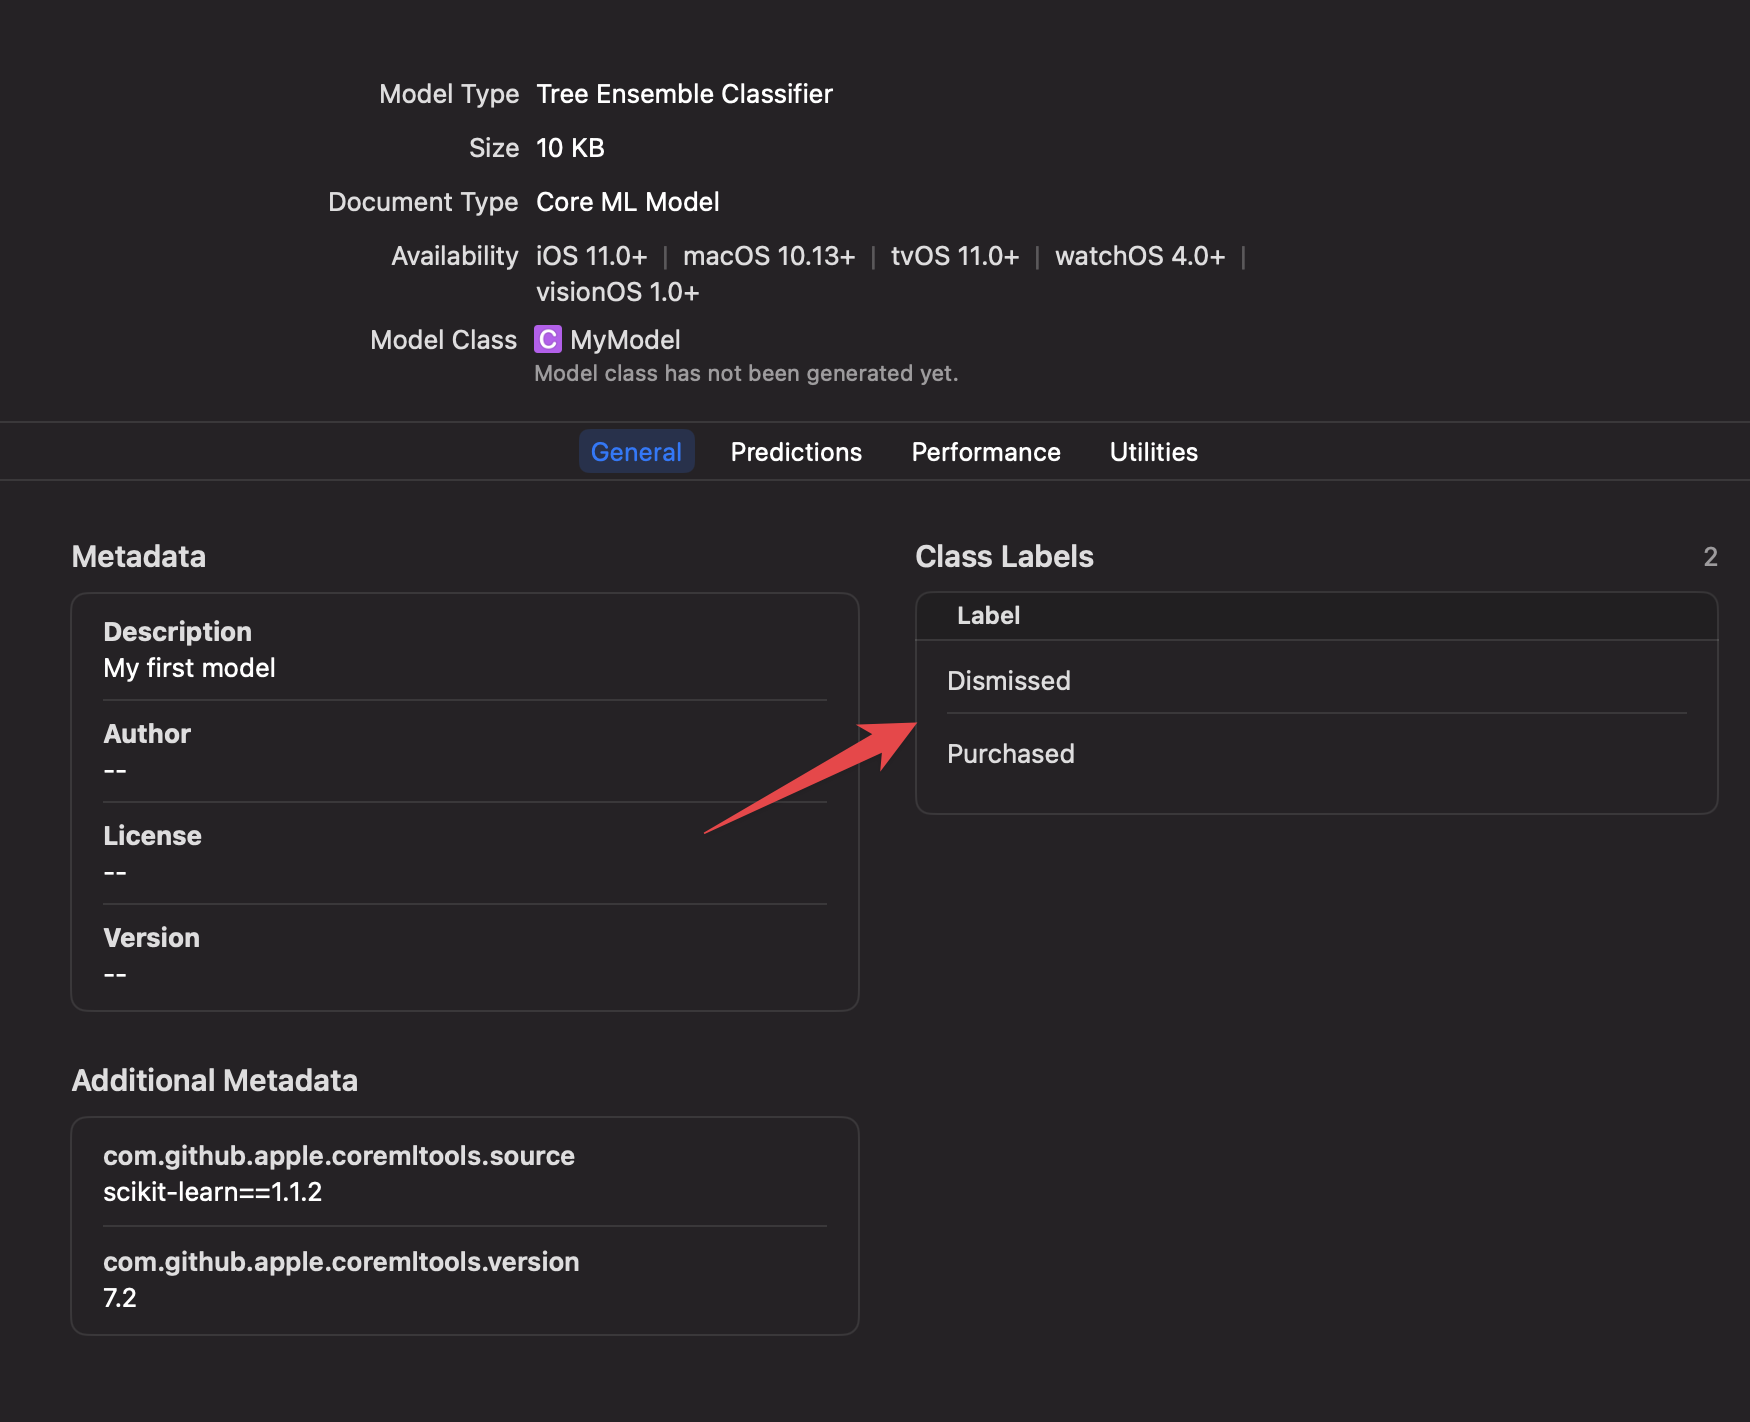
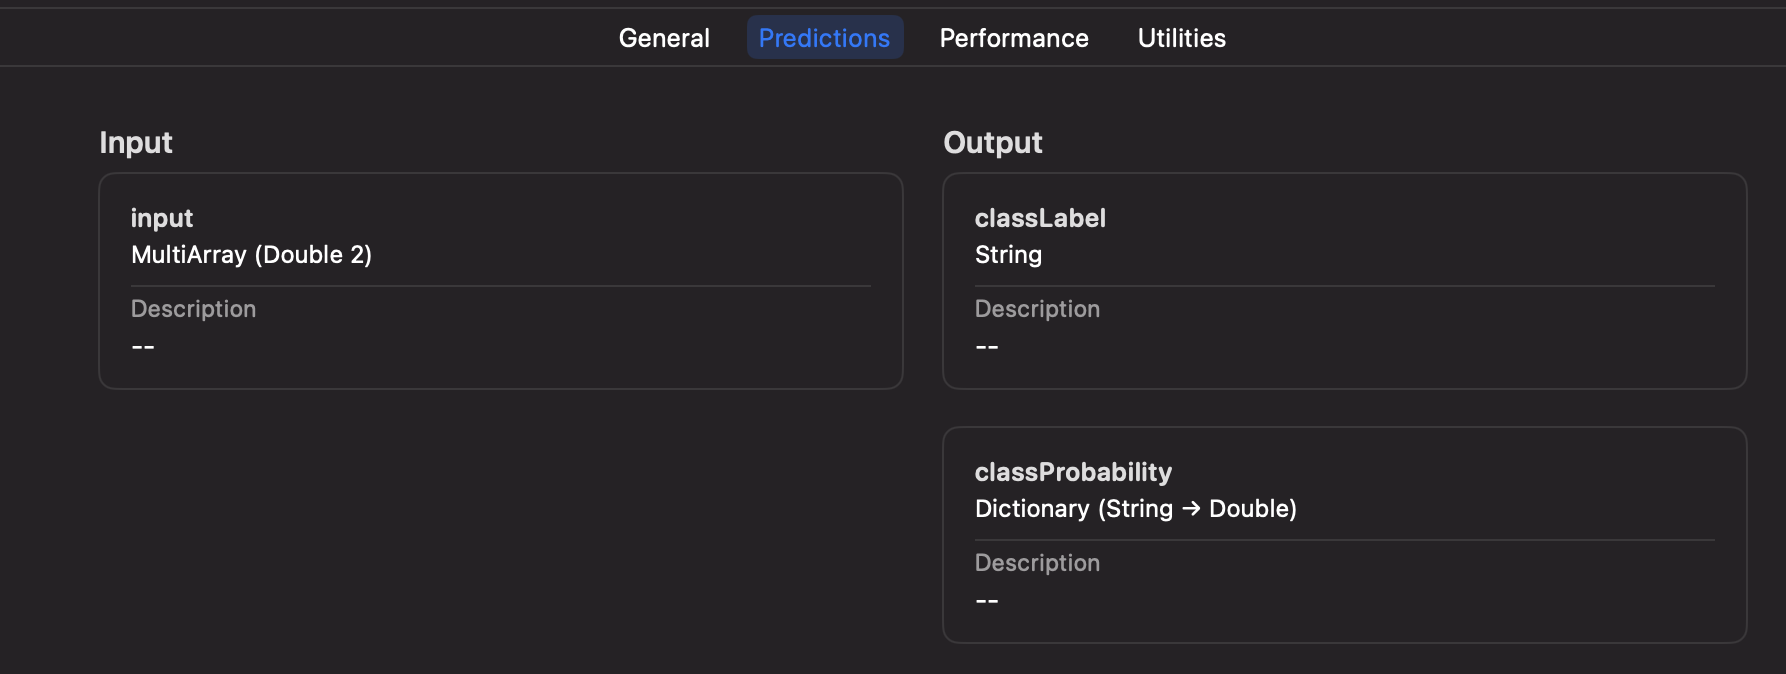
Step 7: Executing your Machine Learning model on-device
Xcode will automatically generate a new Swift class based on your mlmodel file, including the details about the inputs, and outputs.
let batteryLevel = UIDevice.current.batteryLevel
let batteryCharging = UIDevice.current.batteryState == .charging || UIDevice.current.batteryState == .full
do {
    let modelInput = MyFirstCustomModelInput(input: [
       Double(batteryLevel),
       Double(batteryCharging ? 1.0 : 0.0)
    ])
    let result = try MyFirstCustomModel(configuration: MLModelConfiguration()).prediction(input: modelInput)
    let classProbabilities = result.featureValue(for: "classProbability")?.dictionaryValue
    let upsellProbability = classProbabilities?["Purchased"]?.doubleValue ?? -1

    print("Chances of Upsell: \(upsellProbability)")
} catch {
    print("Error running CoreML file: \(error)")
}
In the above code you can see that we pass in the parameters of the battery level, and charging status, using an array of inputs, only identified by the index. This has the downside of not being mapped by an exact string, but the advantage of faster performance if you have hundreds of inputs.
Alternatively, during model training and export, you can switch to using a String-based input for your CoreML file if preferred.
We will talk more about how to best set up your iOS app to get the best of both worlds, while also supporting over-the-air updates, dynamic inputs based on new models, and how to properly handle errors, process the response, manage complex AB tests, safe rollouts, and more.
Conclusion
In this guide we went from collecting the data to feed into your Machine Learning model, to training the model, to running it on-device to make decisions within your app. As you can see, Python and its libraries, including Apple’s CoreMLTools, make it very easy to get started with your first ML model. Thanks to native support of CoreML files in Xcode, and executing them on-device, we have all the advantages of the Apple development platform, like inspecting model details within Xcode, strong types and safe error handling.
In your organization, you’ll likely have a Data Scientist who will be in charge of training, fine-tuning and providing the model. The above guide shows a simple example - with ContextSDK we take more than 180 different signals into account, of different types, patterns, and sources, allowing us to achieve the best results, while keeping the resulting models small and efficient.
Within the next few weeks, we will be publishing a second post on that topic, showcasing how you can deploy new CoreML files to Millions of iOS devices over-the-air within seconds, in a safe & cost-efficient manner, managing complicated AB tests, dynamic input parameters, and more.
Update: Head over to the second post of the ML series
Tags: ios, context, sdk, swift, coreml, machine learning, sklearn, mlmodel | Edit on GitHub
Automatically build & distribute custom iOS SDK Binaries for each customer
Note: This is a cross-post of the original publication on contextsdk.com.
Introduction
This is a follow-up post to our original publication: How to compile and distribute your iOS SDK as a pre-compiled xcframework.
In this technical article we go into the depths of best practices around
- How to automate the deployment of different variants of your SDK to provide a fully customized, white-glove service for your customers
- How this approach allows your SDK to work offline out-of-the box right from the first app start
Build Automation
For everyone who knows me, I love automating iOS app-development processes. Having built fastlane, I learned just how much time you can save, and most importantly: prevent human errors from happening. With ContextSDK, we fully automated the release process.
For example, you need to properly update the version number across many points: your 2 podspec files (see our last blog post), your URLs, adding git tags, updating the docs, etc.
Custom binaries for each customer
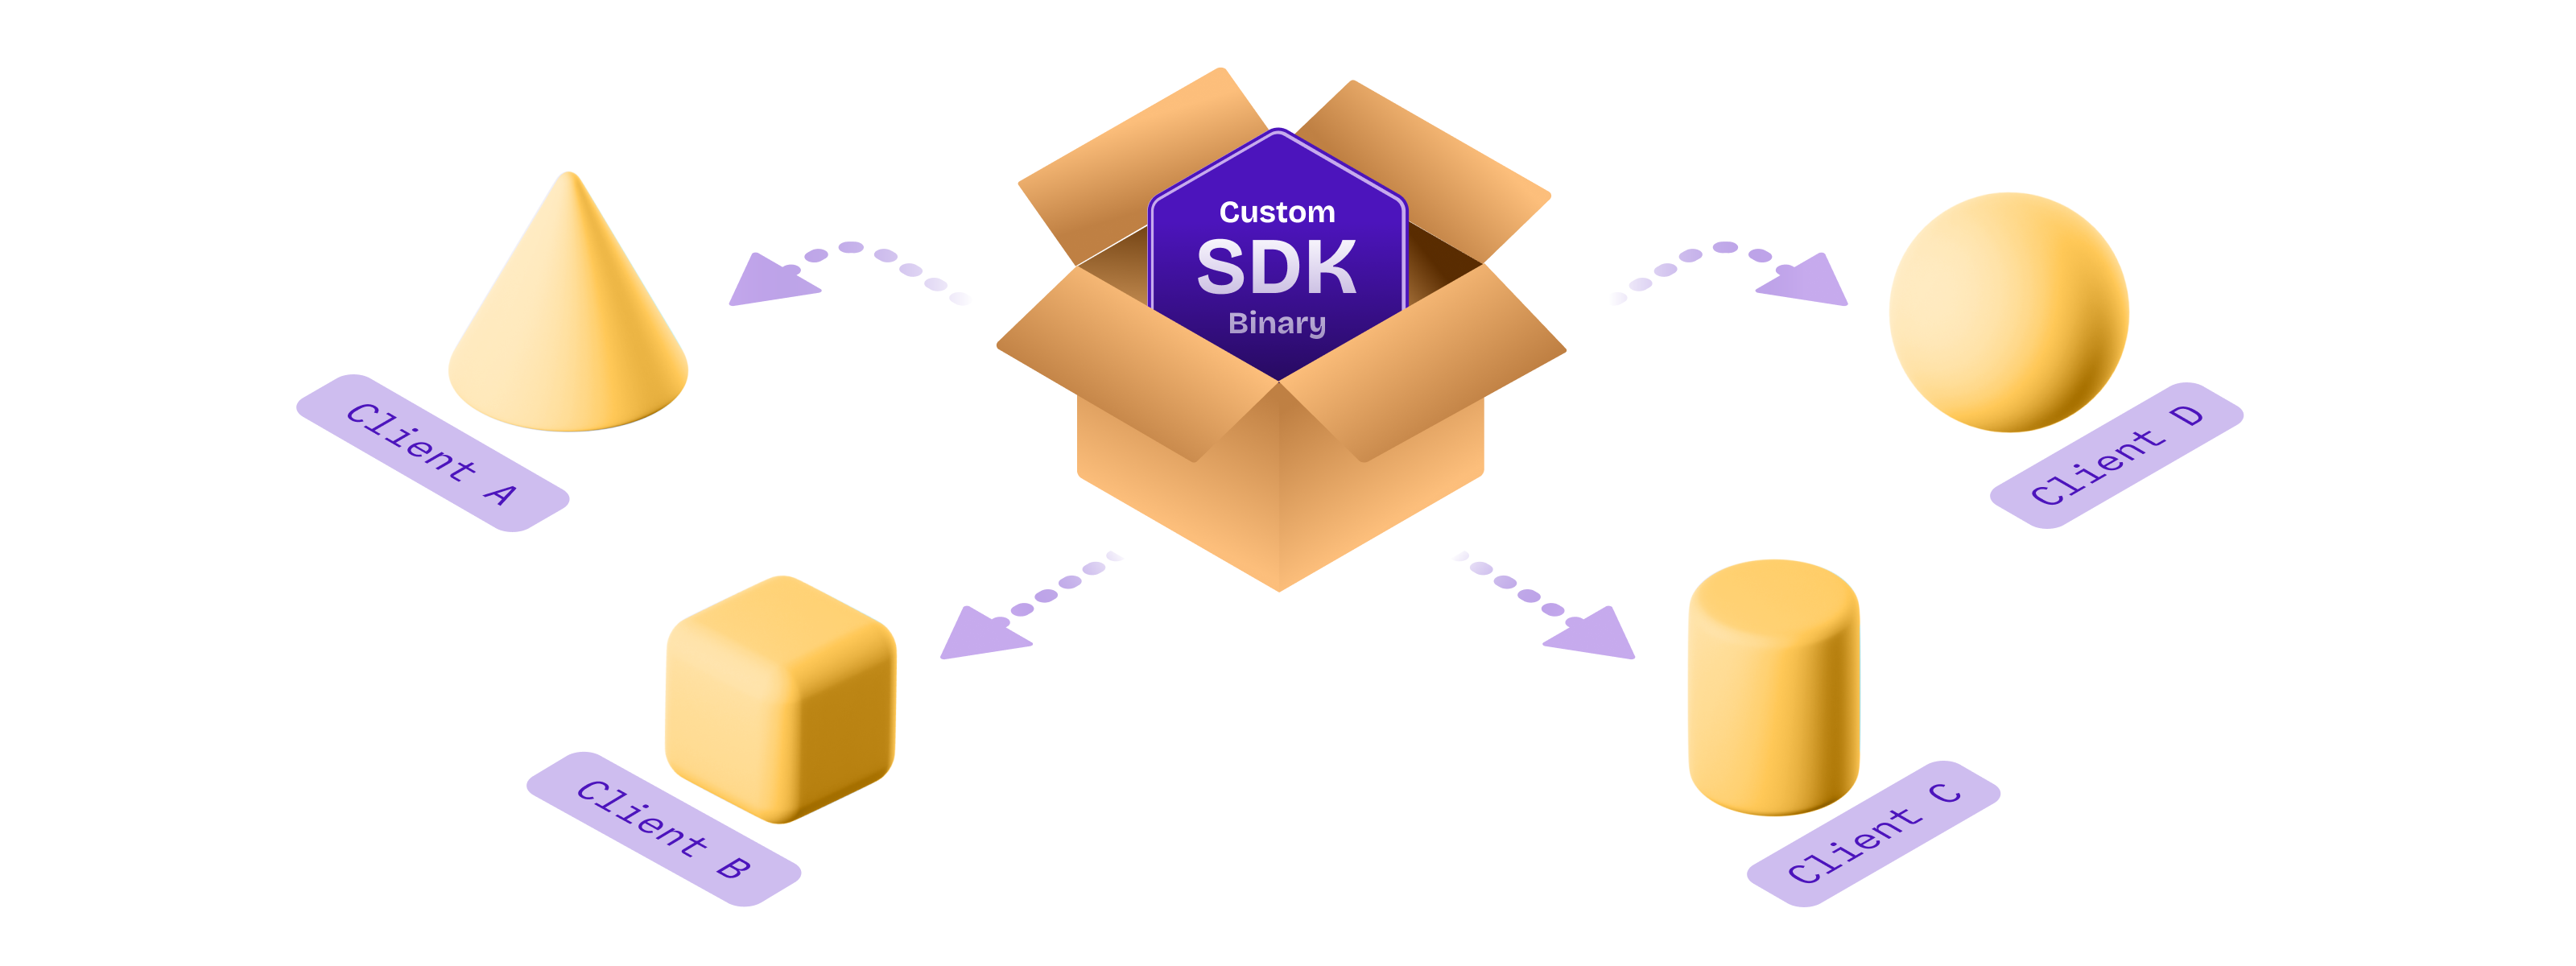
With ContextSDK, we train and deploy custom machine learning models for every one of our customers. The easiest way most companies would solve this is by sending a network request the first time the app is launched, to download the latest custom model for that particular app. However, we believe in fast & robust on-device Machine Learning Model execution, that doesn’t rely on an active internet connection. In particular, many major use-cases of ContextSDK rely on reacting to the user’s context within 2 seconds after the app is first launched, to immediately optimize the onboarding flow, permission prompts and other aspects of your app.
We needed a way to distribute each customer’s custom model with the ContextSDK binary, without including any models from other customers. To do this, we fully automated the deployment of custom SDK binaries, each including the exact custom model, and features the customer needs.
Our customer management system provides the list of custom SDKs to build, tied together with the details of the custom models:
[
  {
    "bundle_identifiers": ["com.customer.app"],
    "app_id": "c2d67cdb-e117-4c3e-acca-2ae7f1a42210",
    "customModels": [
      {
        "flowId": 8362,
        "flowName": "onboarding_upsell",
        "modelVersion": 73
      }, …
    ]
  }, …
]
Our deployment scripts will then iterate over each app, and include all custom models for the given app. You can inject custom classes and custom code before each build through multiple approaches. One approach we took to include custom models dynamically depending on the app, is to update our internal podspec to dynamically add files:
# ...

source_files = Dir['Classes/**/*.swift']
if ENV["CUSTOM_MODEL_APP_ID"]
  source_files += Dir["Classes/Models/Custom/#{ENV["CUSTOM_MODEL_APP_ID"]}/*.mlmodel"]
end

s.source_files = source_files

# ...
In the above example you can see how we leverage a simple environment variable to tell CocoaPods which custom model files to include.
Thanks to iOS projects being compiled, we can guarantee integrity of the codebase itself. Additionally we have hundreds of automated tests (and manual tests) to guarantee alignment of the custom models, matching SDK versions, model versions and each customer’s integration in a separate, auto-generated Xcode project.
Side-note: ContextSDK also supports over-the-air updates of new CoreML files, to update the ones we bundle the app with. This allows us to continuously improve our machine learning models over-time, as we calibrate our context signals to each individual app. Under the hood we deploy new challenger-models to a subset of users, for which we compare the performance, and gradually roll them out more if it matches expectations.
Conclusion
Building and distributing a custom binary for each customer is easier than you may expect. Once your SDK deployment is automated, taking the extra step to build custom binaries isn’t as complex as you may think.
Having this architecture allows us to iterate and move quickly, while having a very robust development and deployment pipeline. Additionally, once we segment our paid features for ContextSDK more, we can automatically only include the subset of functionality each customer wants enabled. For example, we recently launched AppTrackingTransparency.ai, where a customer may only want to use the ATT-related features of ContextSDK, instead of using it to optimise their in-app conversions.
If you have any questions, feel free to reach out to us on Twitter or LinkedIn, or subscribe to our newsletter on contextsdk.com.
Note: This is a cross-post of the original publication on contextsdk.com.
Tags: ios, context, sdk, swift, xcframework, compile, distribute, automation, fastlane, custom | Edit on GitHub
How to automatically compile and distribute your iOS SDK as a pre-compiled xcframework
Note: This is a cross-post of the original publication on contextsdk.com.
Introduction
In this technical article we go into the depths and best practices around
- Working efficiently on a commercial SDK in a larger team
- How to compile and distribute your iOS SDK as a pre-compiled xcframework automatically
How to build and debug an iOS SDK?
At ContextSDK we have our whole iOS Swift codebase in a single local CocoaPod. This allows us to iterate quickly as a team, and have our SDK configuration defined in clean code in version control, instead of some plist Xcode settings.
ContextSDK.podspec
Pod::Spec.new do |s|
  s.name             = 'ContextSDK'
  s.version          = '3.2.0'
  s.summary          = 'Introducing the most intelligent way to know when and how to monetize your user'
  s.swift_version    = '5.7'
  s.homepage         = 'https://contextsdk.com'
  s.author           = { 'KrauseFx' => 'felix@contextsdk.com' }
  s.ios.deployment_target = '14.0'

  # via https://github.com/CocoaPods/cocoapods-packager/issues/216
  s.source = { :git => "file://#{File.expand_path("..", __FILE__)}" }

  s.pod_target_xcconfig = {
    "SWIFT_SERIALIZE_DEBUGGING_OPTIONS" => "NO",
    "OTHER_SWIFT_FLAGS" => "-Xfrontend -no-serialize-debugging-options",
    "BUILD_LIBRARY_FOR_DISTRIBUTION" => "YES", # for swift Library Evolution
    "SWIFT_REFLECTION_METADATA_LEVEL" => "none", # to include less metadata in the resulting binary
  }

  s.frameworks = 'AVFoundation'
  s.public_header_files = 'Classes/**/*.h'
  s.source_files = Dir['Classes/**/*.{swift}']
  s.resource_bundles = { 'ContextSDK' => ['PrivacyInfo.xcprivacy'] }

  s.test_spec 'Tests' do |test_spec|
    test_spec.source_files = [
      'Tests/*.{swift}',
      'Tests/Resources/*.{plist}'
    ]

    test_spec.dependency 'Quick', '7.2.0'
    test_spec.dependency 'Nimble', '12.2.0'
  end
end
During development, we want to easily edit our codebase, run the Demo app, and debug using Xcode. To do that, our Demo app has a simple Podfile referencing our local CocoaPod:
target 'ContextSDKDemo' do
  use_frameworks!
  pod 'ContextSDK', :path => '../ContextSDK', :testspecs => ['Tests']
end
Running pod install will then nicely setup your Xcode workspace, ready to run the local ContextSDK codebase:
Editing a ContextSDK source file (e.g. Context.swift) will then immediately be accessible and used by Xcode during the next compile. This makes development of SDKs extremely easy & efficient.
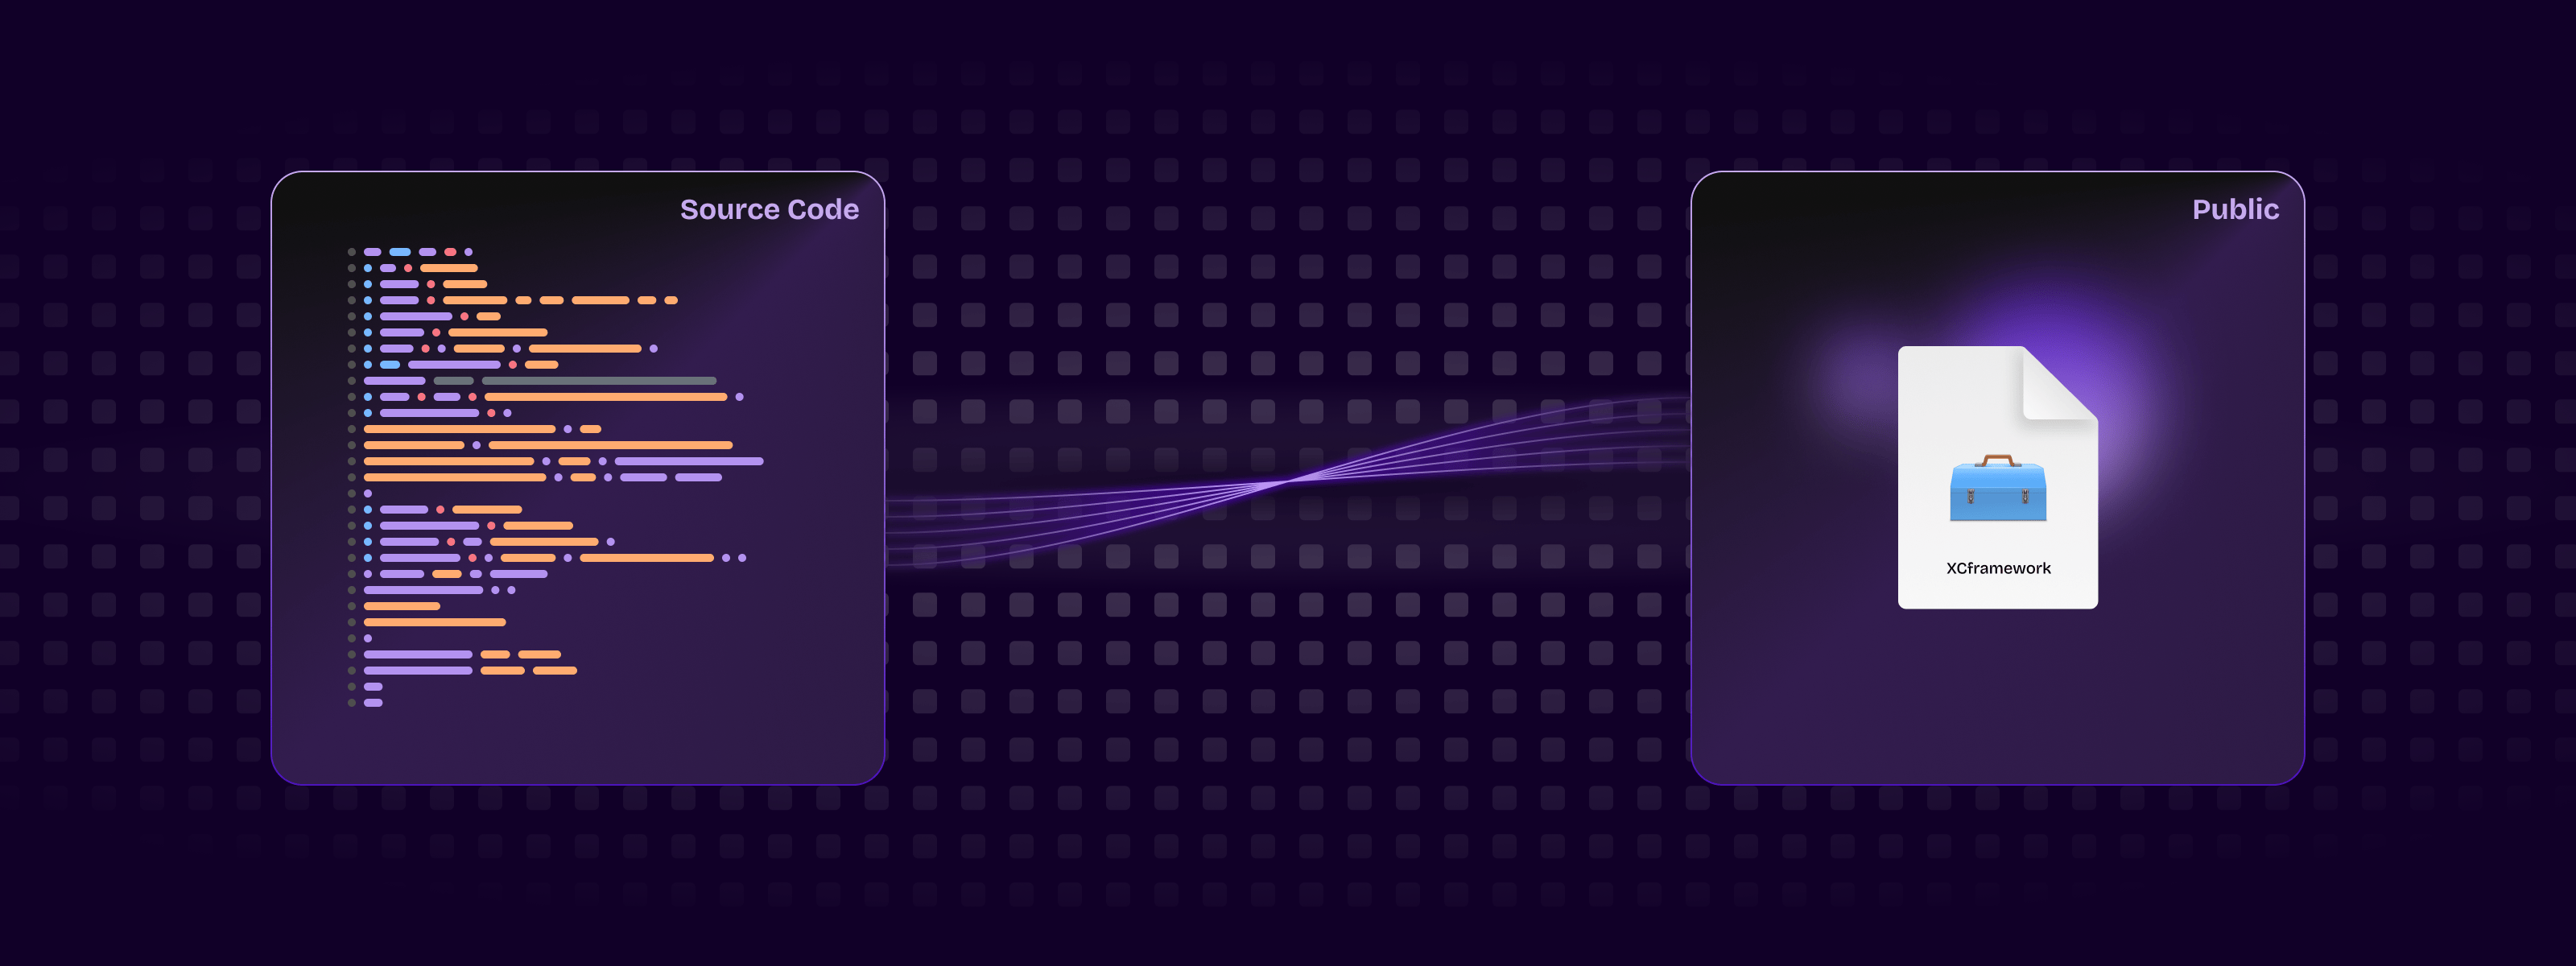
How to compile a CocoaPod into a static binary (xcframework)?
The requirement for commercial SDKs is often that its source code isn’t accessible to its user. To do that, you need to pre-compile your SDK into an .xcframework static binary, which can then be used by your customers.
Thanks to the excellent cocoapods-pack project, started by Dimitris by Square, it’s easily possible to compile your SDK for distribution to your customers. After installing the gem, you can use the following command:
bundle exec pod pack ../ContextSDK.podspec https://contextsdk.com --skip-validation
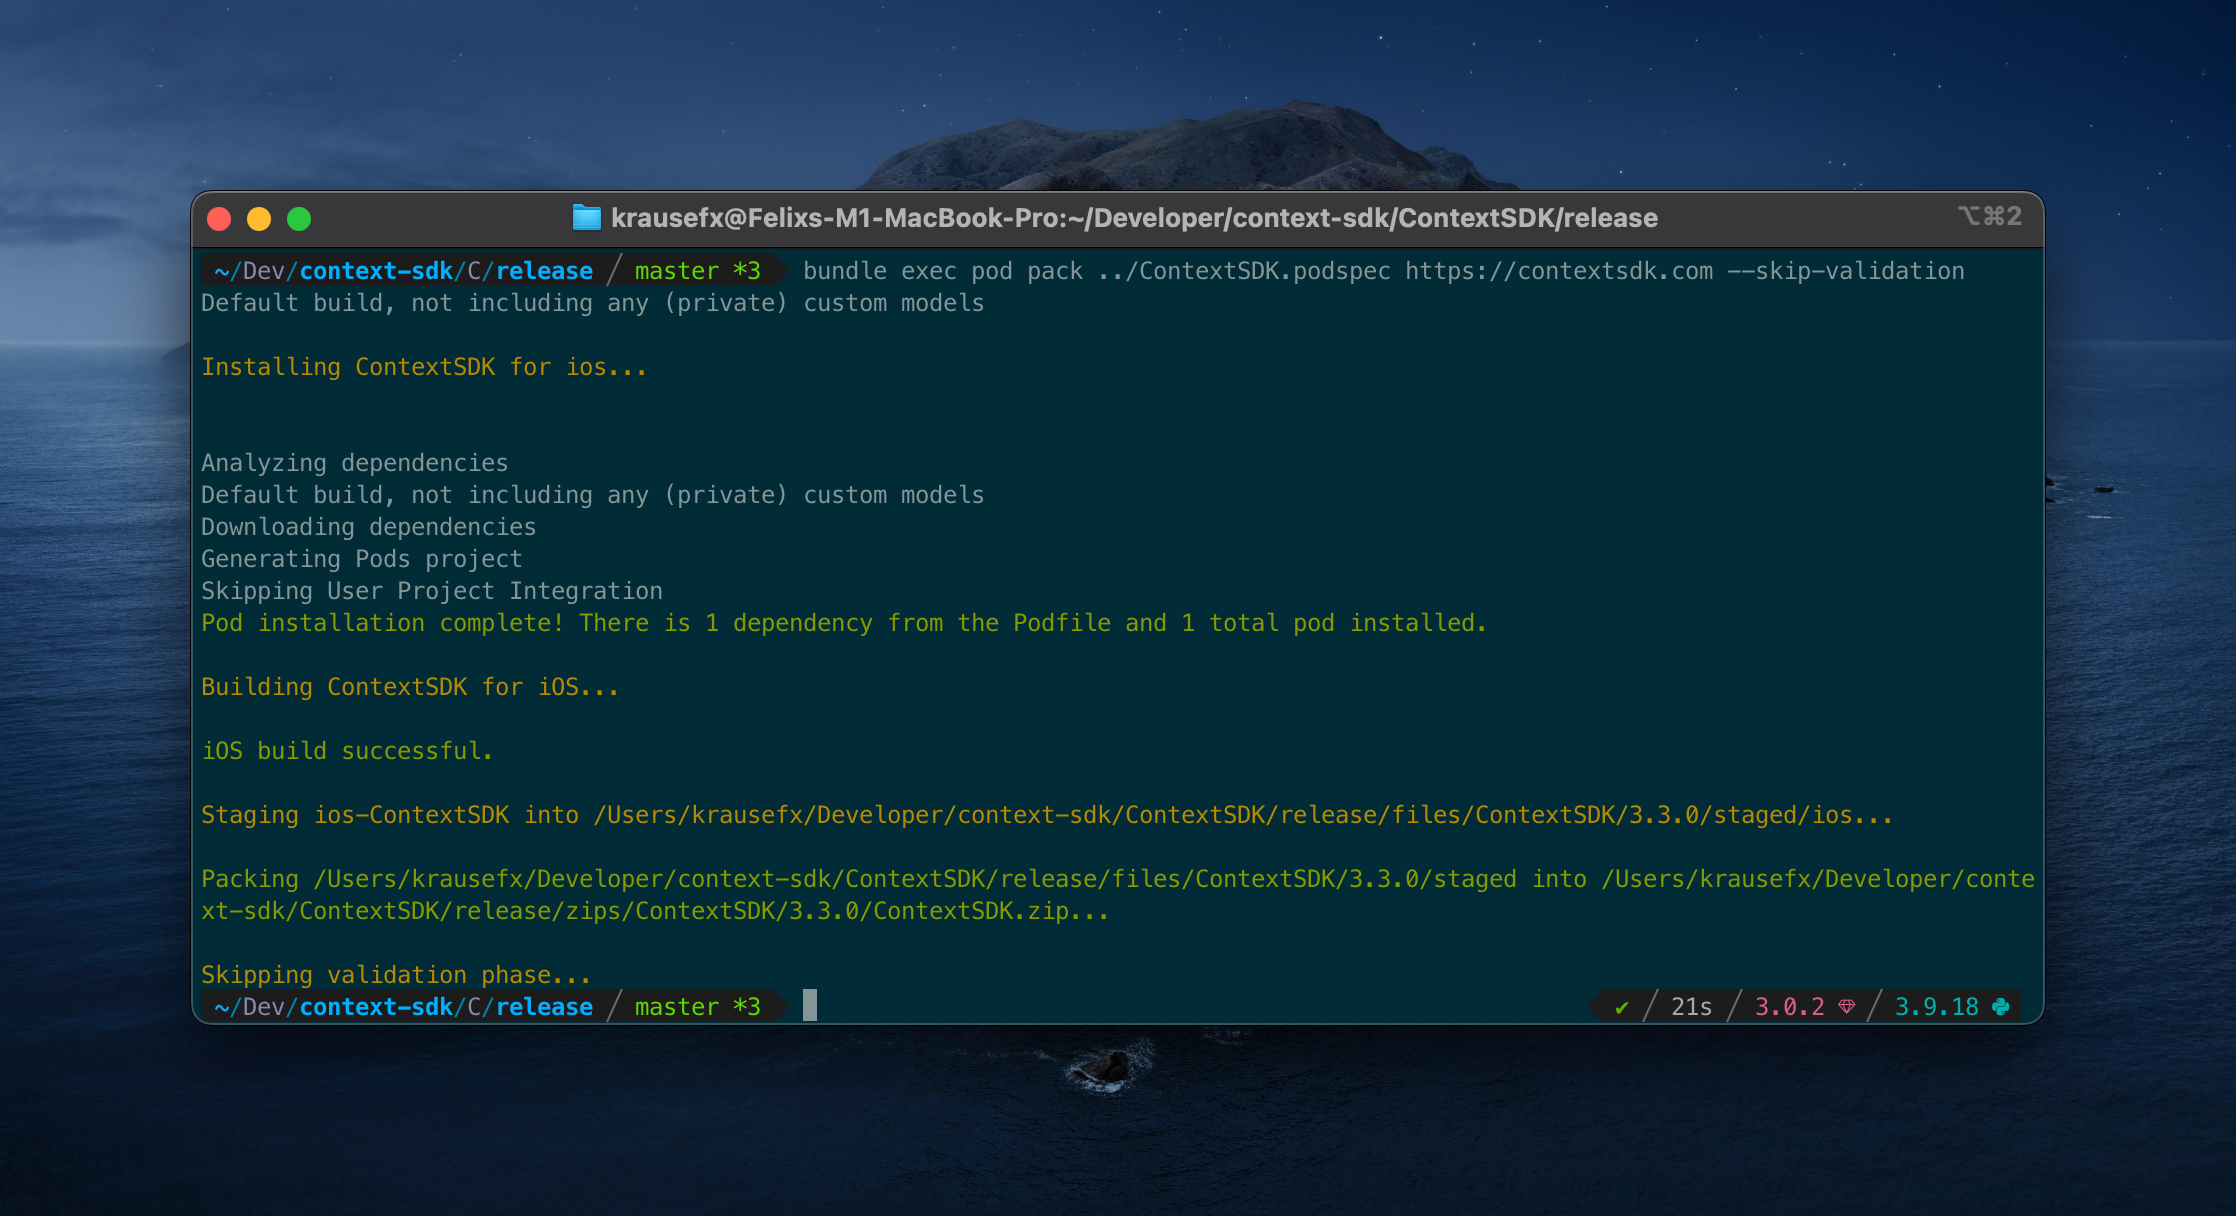
Now open up the folder ./zips/ContextSDK/3.2.0/ and you will see a freshly prepared ContextSDK.zip. You can’t distribute that zip file right-away, as it contains an additional subfolder called ios, which would break the distribution through CocoaPods when we tested it.
As part of our deployment pipeline, we run the following Ruby commands to remove the ios folder, and re-zip the file:
puts "Preparing ContextSDK framework for release..."

sh("rm -rf zips")
sh("bundle exec pod pack ../ContextSDK.podspec https://contextsdk.com --skip-validation") || exit(1)
sh("rm -rf files")

# Important: we need to unzip the zip file, and then zip it again without having the "ios" toplevel folder
# which will break CocoaPods support, as CococaPods only looks inside the root folder, not iOS
zip_file_path = "zips/ContextSDK/#{@version_number}/ContextSDK.zip"
sh("unzip #{zip_file_path} -d zips/current")
sh("cd zips/current/ios && zip -r ../ContextSDK.zip ./*") # Now zip it again, but without the "ios" folder
return "zips/current/ContextSDK.zip"
ContextSDK.zip is now ready for distribution. If you unzip that file, you’ll see the ContextSDK.xcframework contained directly, which is what your users will add to their Xcode project, and will be picked up by CocoaPods.
How to distribute your SDK?
Manual Installation
There are no extra steps needed: the ZIP file you created above is everything that’s needed. Now you can provide the following instructions to your users:
- Download the latest release: [URL to your ZIP file]
- Drag & Drop the
ContextSDK.xcframeworkfolder into the Xcode file list - Go to your project settings, scroll down to
Frameworks, Libraries, and Embedded Content, addContextSDK.xcframework, and selectEmbed & Sign
Through CocoaPods
Distributing your pre-compiled .xcframework file through CocoaPods requires some extra steps.
You need a second ContextSDK.podspec file, that will be available to the public. That podspec will only point to your pre-compiled binary, instead of your source code, therefore it’s safe to distribute to the public.
Pod::Spec.new do |s|
  s.name                = 'ContextSDK'
  s.version             = '3.2.0'
  s.homepage            = 'https://contextsdk.com'
  s.documentation_url   = 'https://docs.contextsdk.com'
  s.license             = { :type => 'Commercial' }
  s.author              = { 'ContextSDK' => 'support@contextsdk.com' }
  s.summary             = 'Introducing the most intelligent way to know when and how to monetize your use'

  s.platform            = :ios, '14.0'
  s.source              = { :http => '[URL to your ZIP file]' }

  s.xcconfig            = { 'FRAMEWORK_SEARCH_PATHS' => '"$(PODS_ROOT)/ContextSDK/**"' }
  s.frameworks          = 'AVFoundation'
  s.requires_arc        = true
  s.swift_version       = '5.7'
  s.module_name         = 'ContextSDK'

  s.preserve_paths      = 'ContextSDK.xcframework'
  s.vendored_frameworks = 'ContextSDK.xcframework'
end
Make both your podspec, and your ZIP file available to the public. Once complete, you can provide the following instructions to your users:
- Add the following dependency to your
Podfile:pod 'ContextSDK', podspec: '[URL to your public .podspec]' - Run
pod install
Through Swift Package Manager (SPM)
Create a new git repo (we called it context-sdk-releases), which will contain all your historic and current releases, as well as a newly created Package.swift file:
// swift-tools-version:5.4

import PackageDescription

let package = Package(
    name: "ContextSDK",
    products: [
        .library(
            name: "ContextSDK",
            targets: ["ContextSDK"]),
    ],
    dependencies: [],
    targets: [
        .binaryTarget(
            name: "ContextSDK",
            path: "releases/ContextSDK.zip"
        )
    ]
)
You can use the same zip file we’ve created with SPM as well. Additionally, you’ll need to make use of git tags for releases, so that your customers can pinpoint a specific release. You can either make this repo public, or you’ll need to manually grant read permission to everyone who wants to use SPM.
To your users, you can provide the following instructions:
- Add
https://github.com/context-sdk/context-sdk-releasesas dependency
Conclusion
As we were building out our automated SDK distribution, we noticed there aren’t a lot of guides online around how to best develop, build and distribute your SDK as a pre-compiled binary, so we hope this article helps you to get started.
If you have any questions, feel free to reach out to us on Twitter or LinkedIn, or subscribe to our newsletter on contextsdk.com.
Note: This is a cross-post of the original publication on contextsdk.com.
Tags: ios, context, sdk, swift, xcframework, compile, distribute, automation, fastlane | Edit on GitHub
ContextSDK - Angel Round, Dieter Rappold joining as CEO, first large customers
Over the last few months, a ton has happened with ContextSDK, a new developer tool to optimize apps based on the user’s current context:
Today, apps often have little logic when it comes to timing in-app communications or upsells. “Every day, billions of prompts and popups are shown at suboptimal times, resulting in annoyed users and increased churn.” said Felix Krause, co-founder of ContextSDK. “With today’s computing power, precise smartphone sensor data, combined with the latest machine learning algorithms, we can do much better than that.” Felix Krause aims to build the foundation for the next generation of mobile apps.

Angel Round
ContextSDK announces its first funding round, led by high profile Business Angels such as Peter Steinberger (founder of PSPDFKit), Johannes Moser (founder of Immerok), Michael Schuster (former Partner Speedinvest), Christopher Zemina (founder Friday Finance, GetPliant), Ionut Ciobotaru (former CEO Verve Group), Eric Seufert (Heracles Capital), Moataz Soliman (co-Founder Instabug) and others.
Dieter Rappold joining as CEO
Dieter Rappold has recently joined ContextSDK as co-founder and CEO. With more than 20 years of experience in building and scaling companies, Dieter will be responsible for the company’s growth and operations.
ContextSDK Performance
One recently onboarded customer, as a case study, showed 500 million upselling prompts, resulting in 24 million sales. With ContextSDK they experienced a remarkable +43% increase in conversion rates for new customers.
ContextSDK is an extremely lightweight SDK for iOS apps, using only 0.2% of CPU, less than a MB of memory footprint, and less than a MB added to the app’s binary size. It is fully GDPR compliant, not collecting any PII at any point.
Privacy
Recently passed laws across the world signify a clear trend towards user privacy and data protection, resulting in many previously used services to be deemed unlawful, or only offering limited capabilities.
ContextSDK was built from the ground up with privacy in mind. All processing, including the execution of machine learning models, happen on-device. ContextSDK operates without any type of PII (Personal Identifiable Information), thanks to a completely new and unique mechanism built to fully protect the user’s privacy while also helping app developers achieve their business goals.
New Website
We’ve also just launched our new ContextSDK website, now including more details on how ContextSDK works, and how it can help your business.
Interested in using ContextSDK?
As ContextSDK is a brand-new product, we carefully select the companies we want to work with. We’ve been seeing the best performance improvements for apps with a minimum of 20,000 monthly active users, as that’s where our machine learning approach really shines. If you believe your app would be a good fit, sign up for ContextSDK here.
We’re hiring
We’re hiring a Data Scientist, check out our careers page.
Full Press Release
Read the full press release on contextsdk.com
Tags: ios, context, sdk, swift, upsell, in-app | Edit on GitHub